Saturday, July 3, 2010

Vicki's White Chocolate Cream Cheese Pie

Putting this here so I don't lose it.

1 8oz package cream cheese
1 1/4 cup cold milk, divided
1 small box jell-o white chocolate instant pudding (regular or sugar free)
1 1/2 cup thawed cool whip (1/2 of 8 oz. tub)
1 pie crust of choice

Beat cream cheese and 1/4 cup milk in large bowl with wire whisk til well-blended. Add remaining 1 cup milk and pudding mix. Beat with wire whisk. Gently stir in whipped topping till well blended. Spoon into crust. Refrigerate 4 hours. Can use any flavor crust (oreo, shortbread, homemade, pillsbury) and can top with anything you want (choc chips, toffee, coconut, or any type fruit).

Monday, February 22, 2010

Stockings...

Here are the Christmas stockings I upgraded. I found a super cute idea at Pleasant Home where you take a pre-made stocking and turn it into something adorable. Now, I have wanted to make stocking for the fearsome threesome for years, but have just never got around to it. Well, this was too cute not to try...sooo.....I went to my local quilt shop, found some cute Christmas fat quarters and came up with....

DSCF4934


DSCF4935


I love the way the turned out...in fact next year a matching tree skirt may be in order. But then again, it took me several years to make stockings. So it may be a while.

Christmas Gifts Part 1 ...

Yes it is February. Yes, I am finally posting about the handmade Christmas gifts. Maybe if I get caught up, I can keep it up...right? We'll see.

Margaret Bag for my Mom

DSCF4954

Messenger Bag from The New Handmade by Cassie Barden

DSCF4947


Action Shot

DSCF4948

Margaret Bag for FIL's Other

DSCF4941


Monday, December 14, 2009

Black Corduroy Jumper

I have had this made for a while. I am just finally getting around to posting it.

DSCF4781
I love this corduroy. I used New Look Pattern 6845 for this dress. I made this pattern last year too. It really is easy and adorable. I love the way the skirt lays. The most difficult part is the zipper, but who likes zippers?

DSCF4661


Saturday, December 12, 2009

Recycled Crayons....

I have been wanting to make recycled crayons with my kids for a long time. So when I found some silicon muffin molds in holiday shapes in the cheapo section of a local department store, I couldn't pass them up.

So after all the crayons were stripped, the kids and I had a blast melting them down into fun shapes.

DSCF4830
Snowflakes (These are my favorite!)

DSCF4832
Christmas Trees

DSCF4831
Snowmen

DSCF4833
Ornaments, Bells, Stars and Stockings

DSCF4834
Little hands loving her creation.

This was a super fun project. The silicon molds work perfectly. To make them, you simply preheat your oven to 250 degrees. Strip your crayons, and then sort them into your molds. You can do all the same color or multiples. Whatever suits your fancy. In my opinion, no more than 3 colors works the best. Once you have them sorted, put the molds on a cookie sheet and bake for 10-15 minutes. Let them cool, pop them out and color. Be careful though, if you pop them out before they are cool enough you will crack the crayon. But then you can just re-bake it!!!

I can't wait to buy other molds.


Tuesday, December 8, 2009

Crayon Folio

Our family took a mini vacation during the Thanksgiving Holidays. We traveled five hours in a car with a 9,6, and 4 year old. As most parents know, this is always trying. So I spent some time looking for things to keep them busy in the car. We have gameboys for each of them, but those only seem to last so long. Then, I found this wonderful pattern by Gingercake for a Crayon Art Folio. I knew it couldn't hurt to take some along.


DSCF4845
So three of these were made for the kiddos.

DSCF4847
This was for Sweet Pea. The pattern was easy to follow and the whole project did not take much time to put together.

DSCF4846
For the boys, I did not add the handles. I felt this made them look more "manly". Less like a purse.

DSCF4848
AJ decided he wanted colored pencils instead of crayons.

I have to admit the long drive went well. The kids still did their share of crabbing and whining, mostly the 4 year old, but I loved having another option to keep them busy. The folios store the crayons and paper right there together so we were not looking for lost crayons continually. It was awesome. Thanks Gingercake!

Monday, November 2, 2009

Fall Margaret Bag

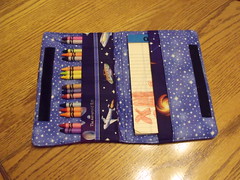
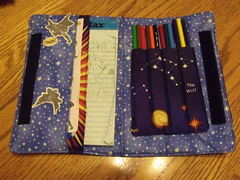
With the golden colors, falling leaves and dropping temperatures, my purses we just not working for me. It was time. Time for a new purse that is. Since I love my other ones so much. I had to make a
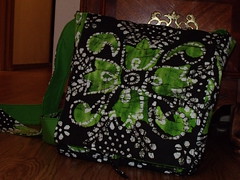
 Margaret Bag.

DSCF4736
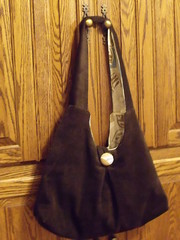
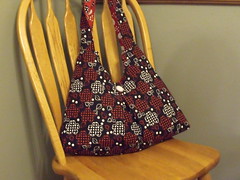
Here is the latest edition to my purse collection.
This one was made out of brown corduroy.

DSCF4715
The lining is a off white print with various shades of tan and blue. I felt this broke up the darkness of the brown.

DSCF4706
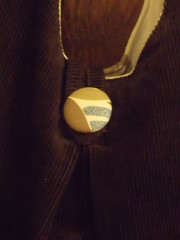
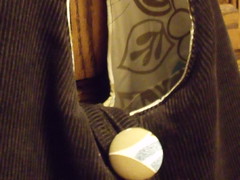
I covered a button with a scrap of the lining fabric.

DSCF4704
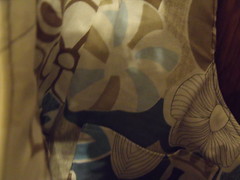
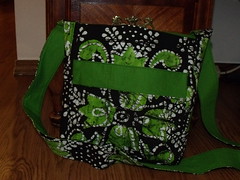
closer view of the lining

DSCF4732
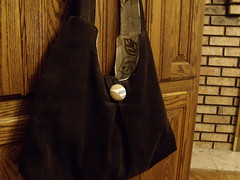
Over all I am extremely pleased with this purse. I love the combination of fabrics. I love the feel of the corduroy. But, honestly, I do not think I will use corduroy again for this bag. The thickness of the fabric made it difficult to manipulate under my machine. Let me tell you, making the button loop was awful!!!
Then the button.... I had originally picked out a dark brown button to use with the corduroy, but once the bag was sewn together, I could tell the brown button would just get lost in the rest of the brown. The fabric button works great, but is a tad big for my button loop. The loop has a difficult time sliding over the button. Of course this could be a purely friction problem. My other Margaret bags have plastic buttons. If I would have used a smaller button, it would have eliminated this problem.